Your car is more than just a mode of transportation; it’s an investment, and like any valuable asset, it requires proper care and maintenance to retain its appeal and value. While regular car washes can keep the exterior clean, car detailing goes the extra mile by offering a deep clean and restoring your vehicle to a like-new condition. Car detailing involves cleaning and reconditioning both the interior and exterior of the car, going far beyond what a typical car wash offers.
While professional detailing services can be expensive, the good news is that you can achieve the same results at home with a few basic tools and products. In this blog, we’ll guide you through the essential steps of DIY car detailing to help you keep your car looking new and well-maintained without breaking the bank.
Table of Contents
Toggle1. What Is Car Detailing?
Car detailing is a meticulous process that restores the exterior and interior of your vehicle to its best possible condition. The goal is to remove dirt, stains, grime, and contaminants that a simple wash might miss, while also protecting the surfaces to preserve their appearance.
Detailing typically includes:
- Exterior Detailing: Cleaning and restoring the car’s paint, wheels, tyres, windows, and trim.
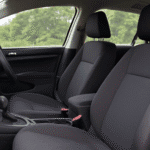
- Interior Detailing: Cleaning and reconditioning the seats, dashboard, carpets, and other surfaces inside the vehicle.
DIY car detailing not only enhances the look of your vehicle but also helps maintain its value by preserving the paint, upholstery, and other components.
2. Why Should You Detail Your Car?
Regular car detailing has several benefits:
- Enhanced Appearance: Detailing restores your car’s shine and lustre, giving it a like-new appearance.
- Increased Resale Value: A well-maintained car with a clean interior and exterior holds its value better than one that’s neglected.
- Preserved Paint: Detailing protects your car’s paint from the elements, such as UV rays, acid rain, bird droppings, and tree sap, which can cause damage over time.
- Improved Comfort and Hygiene: Cleaning the interior of your car removes dirt, dust, and allergens, creating a healthier and more comfortable driving environment.
- Protects Surfaces: Waxing and conditioning help protect surfaces from wear and tear, extending the life of your car’s interior and exterior.
3. DIY Car Detailing: What You Need
Before you begin detailing your car, it’s important to gather the right supplies. Here’s a list of basic products and tools you’ll need for a thorough detailing session:
Exterior Detailing Supplies
- Car Wash Soap: Choose a soap specifically formulated for cars. Avoid dishwashing detergent, as it can strip the protective wax from your vehicle.
- Microfiber Towels: Soft and lint-free towels are essential for drying, buffing, and wiping down your car’s surfaces.
- Wheel Cleaner: A dedicated wheel cleaner will help remove brake dust and grime from your wheels and tyres.
- Tire Cleaner and Shine: To keep your tires looking glossy and black.
- Clay Bar: Used to remove contaminants like tree sap, tar, and road grime from your car’s paint.
- Polish and Wax: Polishing removes minor imperfections, while wax provides a protective coating to keep your car looking shiny and protected.
- Wheel Brushes: A specialized brush for cleaning the intricate designs of your wheels.
- Car Detailing Brushes: Smaller brushes for cleaning hard-to-reach areas, such as around the grille, mirrors, and vents.
Interior Detailing Supplies
- Vacuum Cleaner: A handheld or shop vacuum to thoroughly clean carpets, seats, and upholstery.
- All-Purpose Cleaner: A gentle cleaner for surfaces like the dashboard, door panels, and console.
- Leather Cleaner and Conditioner: For leather seats and trim to keep them soft and prevent cracking.
- Fabric Upholstery Cleaner: For removing stains and dirt from cloth seats and carpets.
- Glass Cleaner: To clean windows and mirrors without leaving streaks.
- Carpet and Upholstery Brushes: To scrub carpets and fabric seats effectively.
- Odour Eliminator: To freshen the air inside your car after cleaning.
4. Step-by-Step Guide to DIY Car Detailing
Now that you have the necessary supplies, let’s break down the step-by-step process for detailing your car.
Exterior Detailing Process
- Rinse Your Car Begin by thoroughly rinsing your car to remove loose dirt, debris, and grime. Use a hose or pressure washer to rinse the entire surface of your car, starting from the top and working your way down.
- Wash the Exterior Using a car wash mitt or microfiber cloth, wash the car with a high-quality car wash soap. Avoid circular motions; instead, use straight motions to prevent swirl marks. Wash the car in sections, and be sure to rinse your mitt frequently to avoid scratching the paint.
- Clean the Wheels Spray your wheel cleaner onto the wheels and let it sit for a few minutes to break down the brake dust. Use a wheel brush to scrub the wheels and remove any stubborn grime. Be sure to clean the tyres with a separate brush and apply a tyre shine product for a glossy finish.
- Clay Bar Treatment After washing, your car may still have some embedded contaminants on the surface. Use a clay bar to gently rub against the paint, removing any remaining dirt, tree sap, or industrial fallout. Use a clay lubricant to ensure the clay bar glides smoothly over the paint.
- Polish the Paint If your car’s paint has minor scratches, swirl marks, or oxidation, use a car polish to restore its shine. Apply a small amount of polish to a microfiber pad and work it into the surface using small, circular motions.
- Wax Your Car Once your car is clean and polished, apply a layer of car wax to protect the paint. Waxing provides a protective barrier against the elements and gives your car a glossy, shiny finish. Apply the wax in small sections, allow it to dry, and then buff it off with a clean microfiber cloth.
Interior Detailing Process
- Vacuum the Interior Start by vacuuming the seats, carpets, and floor mats. Use a handheld vacuum or shop vac to remove dirt, debris, and crumbs from every nook and cranny. Don’t forget to vacuum the crevices between the seats and under the seats.
- Clean the Upholstery Depending on your car’s interior, use a fabric cleaner or leather cleaner to clean the upholstery. For fabric seats, apply a fabric upholstery cleaner and scrub with a brush to remove stains and dirt. For leather seats, use a leather cleaner followed by a leather conditioner to keep the material soft and prevent cracking.
- Wipe Down Surfaces Use an all-purpose cleaner to wipe down the dashboard, center console, door panels, and other hard surfaces. Be gentle and use microfiber towels to avoid scratching. Pay attention to details like air vents, knobs, and cup holders.
- Clean the Windows Use a glass cleaner to clean both the interior and exterior of your windows. Wipe with a microfiber cloth to achieve a streak-free shine.
- Deodorize and Freshen the Interior Use an odour eliminator or air freshener to remove any unpleasant smells inside the car. Place it in the air vents or spray directly onto the upholstery for a fresh scent.
5. Tips for Maintaining Your Car’s Shine
- Regular Washes: To maintain the glossy finish, wash your car every two weeks. This prevents dirt and contaminants from building up.
- Park in the Shade: When possible, park your car in a shaded area to prevent the paint from fading due to UV exposure.
- Protect the Interior: Use sunshades to protect the dashboard and upholstery from sun damage. Regularly clean and condition leather seats to keep them from drying out and cracking.
- Apply a Paint Sealant: After waxing, consider applying a paint sealant for added protection, which lasts longer than traditional wax and provides additional durability.
6. Conclusion: The Benefits of DIY Car Detailing
Car detailing at home is a cost-effective way to keep your vehicle looking fresh and well-maintained. By following these steps and using the right products, you can restore your car’s exterior and interior, preserving its value and appearance for years to come. Not only will you enjoy a cleaner, more comfortable driving experience, but you’ll also enhance your car’s longevity, saving money in the long run.
By dedicating a few hours to DIY detailing, you can make your car look as good as new, and with regular maintenance, keep it shining inside and out for the long haul.


